Tutorial:Getting Started (Twilight Forest)

|
This article is part of the ATLauncher Wiki's Tutorials section. |
Contents
- 1 Prerequisites
- 2 Part One: Overworld
- 3 Part Two: Twilight Portal
- 4 Part Three: Twilight Arrival
- 5 Part Four: Twilight Hunter (Exploration)
- 6 Part Five: With Fire it Writes (Magic Map)
- 7 Part Six: Bug Stomper (Hedge Maze)
- 8 Part Eight: The Boots are Mine! (Small Hollow Hill)
- 9 Part Nine: Leveling Up (Medium Hollow Hill)
- 10 Part Ten: Final Challenge (Large Hollow Hill)
- 11 Epilogue
- 12 Note
Welcome to the beginner's guide for the Twilight Forest mod. Since this guide is hosted on the FTB Wiki, this guide also incorporates elements of other FTB mods at some points, but offers alternatives either in vanilla or from the Twilight Forest mod itself.
Prerequisites[edit]
Below is a list of tasks that this tutorial assumes have been accomplished.
- Twilight Forest and/or your FTB mod pack of choice have been installed
- A new survival world has been created
Part One: Overworld[edit]
As with many tutorials, the first and foremost thing to do is to launch straight into the game as if nothing has changed. Act as if it is a vanilla world. Do some mining, some caving, some resource gathering. There are some resources and goals that should be immediately targeted:
- At least one Diamond (the one major mandatory thing to enter the Forest; all other items are optional)
- Copper Ore, as Copper is sparse in the Twilight Forest; more information on this in a bit
- "Nature"-type blocks; flowers from vanilla and ExtrabiomesXL work fine, as do Indigo Flowers and blocks such as Ferns or Grass; Dead Bushes will not work, but Mushrooms will; at least twelve are necessary, but more are good (also mandatory, but lower priority as flowers & grass are not "rare", per se)
- Enough Iron Ingots for a suit of quality armor; NanoSuit also works fine if playing FTB
- Quality tools, Iron or above
- An established renewable food source of choice (animal farm, wheat farm, etc.)
Once you feel comfortably set up with a good amount of resources and the two mandatory goals of some nature-type blocks and at least one Diamond have been satisfied, you can establish your first portal to the Forest.
Part Two: Twilight Portal[edit]
Select a good location for your portal. Choose the location carefully. It is fine for the portal to be underground, but give yourself enough room to work with, and make sure that you do not set the portal up in a temporary location, as each portal costs a diamond to create. Once a portal is established, it cannot be moved without great expense and difficulty. A note about portal locations: a portal requires a 4x4x4 cube to be set up properly, usually with a floor beneath it.
The coordinates of the portal are also important. Open up the F3 menu while making the portal. Altitude does not matter, but the X and Z are somewhat important. If both the X and Z coordinates are divisible by 256 (e.g. coordinates of X = 1024 Z = 512) or close to divisible (e.g. X = 980) then this is a bad location for a portal. Twilight Forest Landmarks, the most important structures for advancing, are located at coordinates where both are divisible by 256. Thus, creating a portal here could land you in a boss battle with a Hydra or a Naga just after entering the forest.
As with creating a Nether Portal, there is a specific layout for a Twilight Forest portal. Since the Forest is a more "nature"-type world than the Nether, it requires grass and flowers instead of Obsidian. The exact layout is as follows:
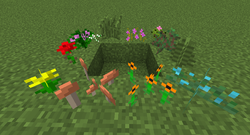
First, dig a 2x2 hole in the ground in the location where you want your portal to be. Make sure that all of the blocks surrounding it (including corners, these are important and cannot be ignored as they can with a Nether Portal) are Grass Blocks. Dirt, Stone or any other block will not work for this purpose.
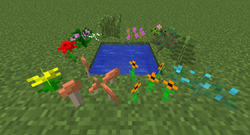
Secondly, fill the 2x2 hole with water source blocks. Surround the 2x2 hole (including the corners!) with the nature-type blocks you collected earlier. In this example, an Indigo Flower, a Fern, some Tall Grass, the two vanilla flowers and some ExtraBiomesXL blocks are shown to emphasize that any of these types can be used.
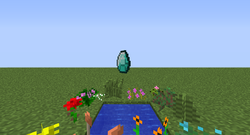
Toss the Diamond that you collected earlier into the 2x2 square of water. You may also wish to back away slightly.
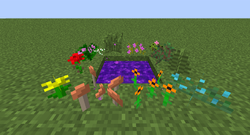
A lightning bolt will strike the portal, even if you are underground. The portal will then be lit and take on a texture not unlike that of a Nether portal. This lightning bolt can deal minor damage, but it will most likely not harm the player unless the player was standing in the water, in which case the player would immediately be teleported to the Forest anyways and it would not matter.
This is not advised; teleporting to the Forest without being prepared can land one in a sticky situation, even if the coordinates are not divisible by 256.
Before entering, prepare oneself. Get some food, some building blocks, and perhaps three or four stacks of torches in Coal and Wooden Planks. Trust me, it's necessary. The Twilight Forest is a very dark realm, and darkness is dangerous here, unlike the Nether.
A note about how the Forest works: whereas one block in the overworld equals eight in the Nether, the ratio with the Forest is 1:1. Thus, a portal at, say, X = 437 Z = 872 would be estimated to link to a portal at about those same coordinates in the Forest.
Part Three: Twilight Arrival[edit]
Once you are prepared with food, armor, torches and equipment, step through the portal. Unlike Nether Portals, Twilight Portals teleport you instantaneously, so make sure you have your sword selected and you are ready for a fight.
Once you enter the Forest, pause the game and assess your surroundings. This is where things get a little bit more biome-dependent.
Part 3.1: Lay of the Land[edit]
Fire Swamp[edit]
If you are in a biome with reddish grass, especially if there is a dragon-looking creature nearby: Be very careful. You're in what's known as a Fire Swamp. Read more here. In a nutshell, jets of fire erupt from blocks that look different from normal grass blocks. Smoke is nothing to worry about, but fire can catch both you and the trees on fire. Stay away from any and all large hills in this biome, as they are Hydra Lairs and very dangerous before you acquire equipment. Lava pits are very prevalent. Fire Resistance potions are helpful here.
Mushroom Forest/Deep Mushroom Forest[edit]
If you see Mycelium and/or giant structures of Giant Mushroom blocks: You are very lucky. You've found a Deep Mushroom Forest. If you have a Silk Touch tool, head back and get it to collect some if you like. You're not in any danger, but Mycelium is somewhat notable. Mushrooms can also be acquired here quite easily by breaking the giant mushrooms, which are much larger than even vanilla giant mushrooms. This is also a potential source of easy food.
Clearing/Clearing Border[edit]
If you don't see trees above you or directly nearby: There may be a Labyrinth nearby, as you are in a Clearing. Don't explore any hills here either, as they are most likely Labyrinths, which are also very dangerous. This is a good place to get set up, though, as it's not so dark, there's forest nearby without impeding on the space to build giant houses/bases, and there's plenty of room to build and expand. It's also wonderfully flat.
Dark Forest[edit]
If everything is dark and you see mushrooms/toadstools: GO BACK. Head back through the portal immediately. You are in a very dangerous biome that merits more preparation than whatever you have done thus far. Once you've gone back through, read more about this biome here and read about how to conquer it here. This is very much necessary. This is a very dangerous biome with King Spiders and Mist Wolves and Skeleton Druids and all sorts of nasty things, and if you're really unlucky, you may also be near a Dark Tower.
Enchanted Forest[edit]
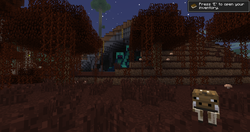
If the foliage cycles between shades of blue and green: You've gotten very lucky, and on your first try, you've found an Enchanted Forest biome. Look around a bit, and if you see a Quest Grove (pictured on left) then denote it with a waypoint on your minimap if you can. Worry not, the giant bighorn sheep you see is not hostile. Check the dispenser on one of the arches in the Grove and see if you can find some wool. Head back to the overworld and see if you can collect one of each color of wool (this cannot be Rockwool.) If you find one of each, head back to the Quest Grove and feed the Quest Ram your wool. You will receive a very potent reward which may very well jump-start your adventures.
Glacier[edit]
If you have spawned on top of ice: You've spawned on top of a Glacier. These are typically several dozen blocks tall. Walk through the colonies of Penguins to reach the edge and then start building a staircase down. Be careful: death by fall is a very real scenario here. It's not the best place to spawn, but it's peaceful and flat. Making a house with any sort of ground-based lighting will be a chore, though. And beware because you may find the castle of the ice queen.
Other Biomes[edit]
If you are in any other biome, or once you've followed the directions that pertain to your specific biome: Get a house or a base set up. Transfer supplies, sleep in a bed, et cetera, whatever you need to do to feel comfortable here. Don't go caving or explore tall hills yet. Unlike the End and Nether, sleeping and spawn-setting is possible in the Forest. It won't change the eternal twilight if you sleep on a singleplayer world or if all the people on a server sleep at once in the Forest, but you can set your spawn.
Once you've gotten set up, it's time to do some more basic resource acquisition. This is marginally easier in the Forest, as the Forest is only 32 blocks thick height-wise, half that of the normal Minecraft world. The exception is the Highlands biome, which is about on par with vanilla Minecraft in elevation, tree type, and so forth.
Part 3.2: Twilight Caving[edit]
Go caving for a little while if you can. You may find it much easier to acquire resources (excepting things that spawn at higher elevations, e.g. Copper; hence the warning to stockpile it before entering) due to the elevation differential here. While caving, you may notice some new blocks:
Torchberry Plant[edit]
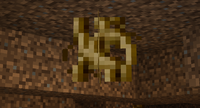
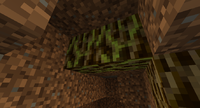
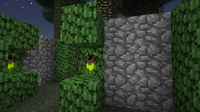
While caving, you will most likely see many Torchberry Plants hanging from the ceiling. These blocks emit a small amount of light and can be destroyed with a single punch by hand. When they are destroyed, they yield Torchberries, a very useful item. Torchberries can be used to craft Torches in place of using Coal to yield five torches instead of four. This can be useful if you run out of coal and you're desperate for lighting sources while caving or exploring, but don't use too many of them, because they are better used in crafting a Magic Map Focus, which we'll talk about in greater depth later.
Torchberries can also be acquired by fighting a Skeleton Druid, which drops them sometimes.
Root Strands[edit]
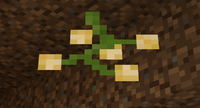
Root Strands are strands of roots that hang from the ceiling and act not unlike Vines from vanilla Minecraft: if one of them is destroyed, all the strands below it will be destroyed. It can also be destroyed in one punch and yields nothing. If collected with Shears or a Chainsaw, it can be placed in a crafting grid to yield one Stick.
Only one is shown in the picture adjacent for clarity, but they are found in strands several meters long hanging from the ceiling.
Root Blocks and Liveroots[edit]
In the Forest, the land below reflects the land above in the form of Root blocks. Root blocks are generated below most trees, such as Canopy Trees, Darkwood Trees, and Twilight Oaks of the larger variety. Naturally generated trees can also sometimes generate Liveroots in place of Root blocks. Trees grown via sapling do not appear to generate Liveroots, or if they do so, it is a very rare occurrence. Thus, Liveroots are a mostly non-renewable resource. Liveroots can be found in caves, ravines and so forth, and drop a single Liveroot when mined. Root blocks drop sticks when mined, and both types can be mined with a hand. An axe works best.
Liveroots can be identified by the fact that they share a similar texture to Root blocks but are tinted green. They are also found in "veins" in line with the lines of Root blocks in approximately the same size as Iron Ore veins, being 4, 6 or 8 blocks in size.
Liveroots are worth collecting, Roots only if you are low on sticks. Liveroots will be discussed more in a bit.
Part 3.3: Twilight Trees[edit]
By now you've probably noticed that the Twilight Forest adds a lot of new tree types. Each of these tree types will be discussed in greater depth here, aside from the four "magic" trees that can only be acquired via cheating. If you are interested in reading up on those, here are some links.
In total, there are five types of new tree in the Twilight Forest.
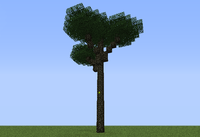
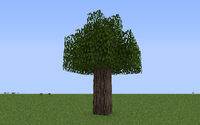
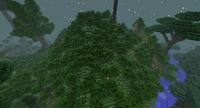
The Canopy Tree is a tree which stretches several dozen blocks in height. It makes up the majority of the canopy of the regular Twilight Forest biomes, as well as some other biomes such as the Enchanted Forest and so forth. When mined, it drops Canopy Tree Wood, which works the same as Spruce Wood from vanilla Minecraft. Like other logs, it can be used in a Sawmill or in recipes such as the Barrel. The Canopy Tree can have a 1x1 trunk or a 2x2 trunk.
The Darkwood Tree is a tree normally only found in the Dark Forest biome, stretching a dozen or so blocks in height. It makes up a very thick and nearly impenetrable canopy of leaves approximately 10 blocks in thickness that prevent people from easily leaving the Dark Forest biome by going upwards. When mined, it drops Darkwood, which also works the same as Spruce Wood. In newer versions of the Forest not yet included in FTB, four Darkwood can be shapelessly combined to create four Towerwood Planks, a nearly flame-retardant (completely so in FTB) version of wooden planks that are nearly impossible to break and occur naturally in Dark Towers. For length reasons, this guide does not cover Dark Towers or other major landmarks. That will be covered in a (currently upcoming) guide, Tutorial:Conquering a Dark Tower (Twilight Forest).
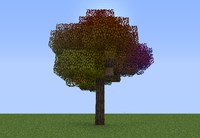
The Rainbow Oak is a rare type of tree that is only found in the Enchanted Forest biome, and even then, it is fairly rare. Its leaves take on different colors based on their coordinates; this is a stable value which may be seed-determined, but the current method of determining Rainbow Oak leaf color is currently unknown. What this means is that the color a leaf takes on when placed in a specific location will always remain the same, no matter how many times it is placed and broken. When mined, Rainbow Oaks drop Twilight Oak Wood, which is an analog to vanilla Oak wood. Apart from their leaves, they are no different from Twilight Oaks of the small variety.
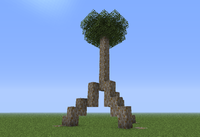
The Twilight Mangrove is a tree type only found in Swamp biomes and only above bodies of water. Its central trunk is supported by three other trunks that touch the ground. Currently, it cannot be grown with saplings, though it drops saplings when its leaves decay or are mined. It drops Mangrove Wood when mined, which is an analog for Birch wood.
Two varieties of Twilight Oak exist: the small variety and the giant variety. The small variety is not very notable, acting identical to a normal Oak tree in both generation, appearance (its logs even look similar) and rarity. It is found in many biomes throughout the Forest and drops Twilight Oak Wood when mined. It is not very notable. On the other hand, it does have a larger variety, which you have most likely noted at least once...
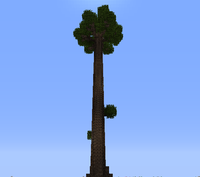
the massive, hulking Giant Twilight Oak. These trees reach several hundred blocks tall, have a hollow trunk and can be up to a whopping nine blocks in diameter. They have a massive crown of leaves, several offshoots off of the main trunk and have Cicadas and Fireflies on their surface. Some of the clusters of leaves at the end of their branches contain a spawner and a chest with rare loot. These trees provide hundreds of logs, even thousands, and cannot be cut down in a reasonable quantity of time without help from friends on a multiplayer server, help from the power of fire (LAG WARNING; NOT RECOMMENDED), or help from instant-mining tools. They cannot be normally grown, except from a Robust Twilight Oak Sapling, a rare find that cannot be dropped from normal Twilight Oak Leaves and is instead found as loot in chests in the upper branches.
Part 3.4: Twilight Gear[edit]
If you plan on using electric armor and tools: You can skip this next section if you so choose. For those who only install Twilight Forest, an armor upgrade will be necessary to survive the dangers of the Forest.
Collect a fair amount of Iron while in the caves, as well as a few blocks of Gold Ore. Not much is necessary, just maybe one or two veins of Gold, especially if using a Macerator or Pulverizer for ore processing. If you've also collected some Liveroot, then we can make some new armor and tools. This gear will also have innate enchantments, as Twilight Forest armor and weapons do. Enchantment quality and level will increase with the rarity of the crafting ingredients.
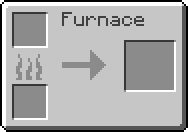
First, we need to make some new crafting ingredients and smelt them up [1]:
|
Ingredients:
Produces 1 x Raw Ironwood Materials |
|
|---|---|
Ingredients:
Produces 2 x Ironwood Ingot |
Let's say, for example, that you want to make one of each tool (minus an Ironwood Hoe and two pickaxes instead of one) and a suit of armor out of Ironwood. This will take two blocks of iron (18 ingots), the same amount of Liveroot and only two gold ingots. This is a highly efficient way of crafting gear, especially as with a Macerator or Pulverizer, only 9 iron ore and 1 gold ore plus 18 Liveroot[2] equals a quality set of gear. Not only that, but Ironwood Armor is 1/3 more durable than regular Iron armor as well as having marginally more protection powers. Ironwood Tools are about twice as durable as normal Iron tools. All of these also have innate enchantments.
Part Four: Twilight Hunter (Exploration)[edit]
Now that we've got some new gear, we can explore the forest more fully. First, a word on creatures: each passive mob in the overworld has a counterpart in the Forest. The two can be transformed back and forth with the use of Transformation Powder found as dungeon loot. Bighorn Sheep equals Sheep, Deer equals Cow, Boar equals Pig, Penguin equals Chicken. This holds true for hostile mobs as well; for example, Redcap Goblins (a low-level enemy in Hollow Hills) equals Villagers, for whatever reason. If you've discovered any creatures up to this point, you now know their overworld counterparts. Each mob also has similar drops and behaviors to its overworld counterpart.
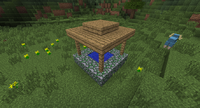
Wells are found dotted across the landscape. These can be 1x1 or 2x2. These can sometimes have chests with low-level loot near the bottom, but are dangerous to explore due to the threat of drowning. Suggested tactics include using a Jetpack or Electric Jetpack if you have one, using a Door or a Sign for underwater air pockets, or simply using Ladders to rappel down from the top of the well to the bottom to acquire the loot.
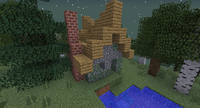
Be on the lookout for Skeleton Druid houses, which are made out of Mossy Cobblestone and Wooden Planks with a brick chimney. These have Skeleton Druid spawners inside. Skeleton Druids can poison the player, but can also drop Torchberries. This can be a fairly valuable resource, as they also drop Bones to grow things with. Thus, the spawner can be a fairly valuable resource, and sometimes a method of getting Gold as Skeleton Druids also very rarely drop a Gold Hoe.
Also be on the lookout for large hills that rise high above the land. Mark these with a waypoint on your minimap, and we'll return to them later to explore them. If you find one that has a bunch of ghost-looking creatures flying around it and looks a lot (and I mean a lot) larger than the rest, don't attempt to approach it, especially if there are caves running through it. These hills are more dangerous than the others by an order of magnitude.
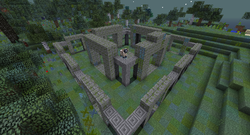
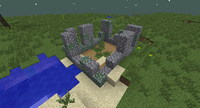
If you find a structure made out of mossy cobblestone with no clear form and some wooden plank flooring, try digging down. These structures will sometimes have secret rooms beneath them with some weak loot within them. These rooms may also contain some low-tier monsters, such as Zombies, Skeletons and Kobolds, a mob we'll talk more about later.
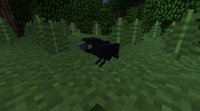
Your main goal should be finding a Forest Raven, pictured to the right. Ravens are most common in Highlands, Clearings and sometimes Swamps. Once you find one, kill it. These have quite a lot of health, so be patient. It may sometimes drop a Raven Feather, and once you've got at least one of those, we can move on to the next major step.
Part Five: With Fire it Writes (Magic Map)[edit]
We're now going to craft more new items, this time of the navigational variety.
|
Ingredients:
Produces 1 x Magic Map Focus |
|
|---|---|
Ingredients:
Produces 1 x Blank Magic Map |
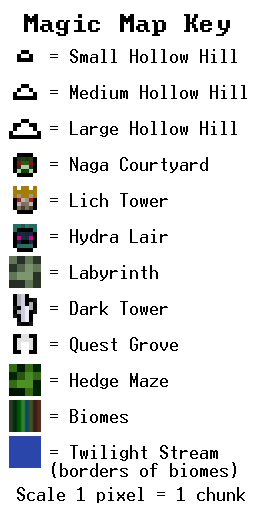
Once you've got a Magic Map, right click with it in hand to "center" it, as you would with a vanilla map. The Magic Map displays the colors of biomes instead of the colors of the terrain from overhead, providing an even more useful navigation mechanic. The Magic Map is very large-scale, where every pixel on the Map equals a 16x16 area (one chunk, 256 m2.) In total, the Magic Map charts an area of 2,048 meters by 2,048 meters, or 4,194,304 m2.
Also on the Magic Map are icons denoting each of the major Twilight Forest Landmarks. It's now time for some true exploration. To the right is a key for the Magic Map that explains all of its different icons. For now, Small and Medium Hollow Hills are good to explore, as are Quest Groves and Hedge Mazes. If you see a Quest Grove, head there as soon as you can. These are very valuable as described earlier. For now, we're going to deal with how to conquer a Hedge Maze.
Part Six: Bug Stomper (Hedge Maze)[edit]
If you are interested solely in acquiring lots of loot from the Forest and/or if you feel you are already versed in combat and tactics, skip this section. This section is geared towards players of lower skill so that they can be acclimated to combat in the Forest.
Now that we have a Magic Map, we can easily map the Forest, and quite a bit of it as well. The first thing you're going to want to do is find a Hedge Maze so that you can get acclimated to a bit of combat in the Forest. These are not very dangerous but can sometimes contain very valuable vanilla loot. Occasionally, a Diamond Hoe can be found in one of the chests, which can be reduced into two Diamonds with aid from FTB machines.
Use your Magic Map to do so, as well as navigational skills. Bring up the F3 menu and focus on the biome. Stay away from Fire Swamps, which always spawn Hydra Lairs, as well as from Enchanted Forests (they're great, but not the focus at the moment), Glaciers (no landmarks to be had) and Clearings (only Labyrinths here.) Explore the area that your Map covers, and when you note an icon that looks like the Hedge Maze icon displayed in the key to the right, start heading there.
Important: The icon for the Hedge Maze and the icon for the Labyrinth are basically the same icon; what the mod maker did when making the Labyrinth icon was he took the icon for the Hedge Maze and lowered its saturation value, making them almost identical, so be careful not to wander into the lion's maw and go into a Labyrinth. Look for vines, hedges, a rectangular indentation, and lots of tiny purple spiders, and stay away from clearings, hills, iron bars and/or a grey-green stone type. The former are characteristics of a Hedge Maze, the latter of a Labyrinth.
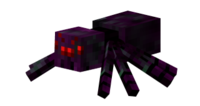
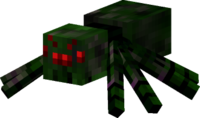
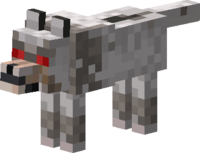
Once you have found a Hedge Maze, you're going to rapidly notice that some new mobs have been created by the mod maker. Let's take a look at them here. Note: Don't bring wolves into a Hedge Maze, for reasons we'll talk about in a bit, and try not to approach a Hedge Maze near a colony of wolves.
| Mobs Approach : | |
|---|---|
| Mob Name: Swarm Spider | |
| Mob Name: Hedge Spider | |
| Mob Name: Hostile Wolf |
Because the threat level is low in a Hedge Maze, it makes the perfect learning grounds for learning new and better techniques and tactics. Even though the threat of death is fairly low as compared to other TF locations, it's still a bit of a challenge.
Swarm Spiders are just there to annoy you and push you around. Unless they are found in very, very large numbers (a swarm of 10 or 12 is about right) they can't even deal damage at all. Don't make them a secondary priority, though; get right to the spawner and destroy it if you can. This is very helpful.
Hedge Spiders have a different name from vanilla spiders but are essentially vanilla spiders. They have the same health, deal the same damage, are the same size, have the same abilities and so forth. Treat them like you would a normal spider.
Hostile Wolves, on the other hand, are another matter. These guys are a little bit tougher. They spawn from a specific type of spawner which doesn't always occur within a Hedge Maze. Here's why you don't want to bring wolves into the Hedge Maze and why you don't want wolves to be nearby: if you try to attack them, that may cause other wolves to become hostile as well, attacking you instead. This may cause a swarm of hostile wolves, which is never a good thing.
Tactics[edit]
My tactics for the Twilight Forest are basically as follows: no matter what level my armor, preparedness and weapons are at, I always go into "Super Hostile" mode. For those of you who have played the Super Hostile series by Vechs or other Complete-the-Monument maps, you'll know exactly what I mean. For those of you who haven't, in a nutshell, the Super Hostile series is like Minecraft but more difficult by an order of magnitude. There's traps, monsters that can't normally spawn in vanilla or do so very rarely (e.g. supercharged creepers, armored and weaponized monsters, monsters with higher health levels) and the map is blatantly attempting to kill you in any way possible. Take it seriously, be paranoid, and be prepared.
I'm going to preface this with saying that yes, a jetpack is immensely helpful here, as you can jump over the walls, get to the spawners, destroy them with your mining drill and collect the loot from the boxes. However, this dungeon is intended to adjust you from vanilla Minecraft combat to the chaotic combat that is the Twilight Forest. In the Forest, there's some dungeons where having a jetpack is more of a disadvantage than anything else, so get used to not having a jetpack. NanoSuit is fine, electric tools are iffy, and a BatPack or a LapPack can land you in very great danger if you equip it in the heat of battle (that is, barring having a Nano Saber and full quantum with a GraviChestPlate, which you probably don't) and don't defend yourself properly with your actual armor chestplate.
Here's what you want to do to prevent death. These guidelines also apply to pretty much any dungeon in the Forest, although there are specific guidelines for some dungeons that may differ from these:
Establish a base. Even if you don't feel that you need it, establish a quick base with a bed, a few chests, a workbench and maybe a furnace. It doesn't need to be large, just somewhere where you can get re-equipped and get your bearings before venturing back into the fray to recover your items. This holds true for this and all other landmarks in the Forest. Also make sure to build your base a decent distance away from the landmark so that your base isn't swarming with spiders while you attempt to recover from dying.
Two major tenets: building blocks and lighting. Have several stacks of each when going in. This is less necessary for the Hedge Maze, as odds are that the Hedge Maze is in broad daylight, so lighting won't help in the first place, as all Hedge Maze monsters spawn independent of light levels. Building blocks are helpful for so many reasons: you can build barriers to prevent monsters from getting in, you can seal yourself off to regen health or drink a potion, you can pillar upwards to survey the dungeon from above (not as useful with dungeons such as the Labyrinth that have a low ceiling; keep that in mind) and more.
For this particular dungeon, I would advise building barriers and lots of them to wall off passageways that you haven't yet explored. This way, you stay organized and you don't get lost. Obviously, you pretty much can't build a roof over the entire thing without great unnecessary effort, so stick to barriers. These don't always keep spiders away unless you build a lip halfway up for spider prevention, which is tricky, but they do give you some time to retreat and think.
If you're low on blocks or time, you can also do a "waffle"-patterned wall. Build two rows of blocks going across with a one-block gap between the two, and then, to prevent the wolves and spiders from easily entering in, do the same thing with two columns. This is easier with a jetpack.
Don't underestimate the threat level. Even if the potential threat level of a landmark is fairly low, don't underestimate it. This causes arrogance, which will inevitably lead to failure. Treat each landmark as if there's a very real and imminent chance that it will kill you.
Don't forget the block button. Blocking with your sword reduces incoming damage, whether or not you have armor. If an enemy is approaching and you're confident that you can't kill them, hit them once and then try to block. Likewise, don't forget the attack button either, as if you simply hold the block button while enemies pound you into a corner, you're going to die painfully.
Mobs before loot. When I enter a cave, I always make sure that the cave is fully lit (or, at least, the tunnel I'm in is) before I mine the first block of ore. Make sure that there are no spawners and no residual mobs within a good distance of you before you open a chest and collect loot, not after.
Eyes open, sword out. Even if you think that you've secured the area, keep your sword out at all times. Always stay alert and have your sword selected except when you are using your pickaxe or another tool to do something, e.g. breaking spawners or modifying a barrier to be more secure. As a matter of fact, if you really want to be secure in loot-gathering, a sound method of doing this is to destroy all the spawners and residual monsters (not just those in your area), then go through and open the boxes.
Don't try to cheat. The Twilight Forest is intentionally made so that you can cheat if you absolutely need to, but it punishes you dearly for it. Cheating, more often than not, is a detriment. For example, you can walk on the walls of the Hedge Maze, but the Hedges hurt you when you walk on them. You can dig through the one-block-thick walls, but this also damages you, and fairly quickly. For this one, I would advise not cheating unless you are desperate and you need to escape and regroup your resources.
Hedge Maze Specific Battle Plan[edit]
When you walk into the Hedge Maze, start building barriers, if only to keep yourself organized. Denote your base that you made and the entrance that you used with waypoints to keep yourself properly oriented. Focus on one path. Don't multitask. Deal with the Hedge Spiders and the Hostile Wolves, then deal with the annoying little Swarm Spiders. Deal with enemies first, then collect loot. Don't dig through the hedges, keep your sword out at all times, and take it seriously.
Once you feel that you've been adjusted to combat within the Twilight Forest, we can continue to the next section, in which we will take on a Small Hollow Hill. You've probably heard that the Twilight Forest is a good way to jump-start your game by getting a lot of resources in a very short time. This is true, but such resource gathering is not for the light of heart or the faint of combat. We're going to start with a Small Hollow Hill, which contains mostly Redstone, Iron, Lapis and other low-level minerals, and work our way up to a Large Hollow Hill, which contains large quantities of almost every valuable mineral known to FTB, including emeralds/diamonds and excluding Iridium Ore. A single Large Hollow Hill can produce, on average, about a half-stack of Emerald Ore, over a stack of Diamond Ore, several stacks of Lapis, Redstone and Gold, and as much Coal as you would ever need in a lifetime of FTB.
Part Eight: The Boots are Mine! (Small Hollow Hill)[edit]
Using the Magic Map Key that you saw earlier in this article, your next task is to locate a Small Hollow Hill. You may notice that the icons for the different types of Hollow Hill are similar in design, which is due to the fact that they are essentially the same icon at different sizes. A Small Hollow Hill will have an icon a total of four pixels wide, a Medium Hollow Hill will have one six pixels wide, and a Large Hollow Hill will have an icon eight pixels wide. Find a Hollow Hill which looks noticeably smaller than the rest, and then we can proceed.
First, let's take a look at the mobs you'll meet in a Small Hollow Hill:
| Mobs Approach: | |
|---|---|
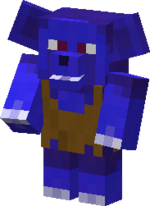
| Mob Name: Kobold | |
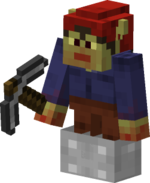
| Mob Name: Redcap Goblin |
Kobolds are small, blue-looking goblin-like mobs that scurry around and make quite annoying grunting sounds. If you are sensitive to annoying or high-pitched noises, I suggest you turn your speakers or in-game sounds off, as both these and the Redcap Goblins make annoying and high-pitched noises. Kobolds run around Hollow Hills and Twilight Forest Caves in packs of about 4 to 7. They will almost never be found alone. Kobolds are not very strong and do not deal much damage. They are also very cowardly creatures, and they aren't very smart either. As soon as one of their Kobold friends has died, the rest will begin weeping, fleeing for a few seconds before attacking again. Kobolds will drop Wheat and Gold Nuggets when killed.
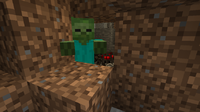
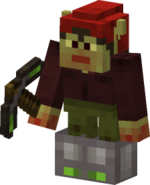
Redcap Goblins are a bit more dangerous. Although they aren't as dangerous as some other mobs we'll encounter later, they can pose a bit of a challenge as they have the same health as you but are also armored with a pair of Iron Boots. This makes them marginally more difficult to kill than killing an unarmored player. They also have a stronger variant, the Redcap Sapper, which we'll talk about later. When killed, they can drop Coal, Iron Boots and/or an Iron Pickaxe. They also drop a Maze Map Focus, but this is a very rare occurrence in later versions of the Twilight Forest mod.
If you're playing on nearly any pack except Beta Pack A, the drop chance of a Focus will be very rare. If, by any chance, you do acquire a Maze Map Focus from a Redcap, keep it and don't make it into a Maze Map. Later versions of TF make this a very valuable item, only dropped by Minotaurs or found in Labyrinth chests on any sort of regular basis. Thus, acquiring one from a Redcap is a stroke of good fortune, and the Focus should most likely be reserved for the creation of an Uncrafting Table, a versatile crafting table that also carries some functions of an Anvil from vanilla Minecraft and allows for the "uncrafting" of items, i.e. turning items into their component parts. This doesn't work with all mod items, though, and you'll still need an anvil for applying enchanted books to items.
Tactics[edit]
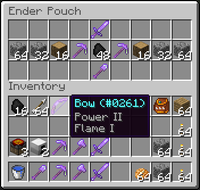
Take an Ender Pouch. You will be acquiring lots and lots of items, some of which you'll want, some of which you won't and some of which you might lose. If you want to keep things safe, take an Ender Pouch or even two and store the items you want to keep in there. It's also helpful for inventory management; instead of making the hard choices, like "Now, do I want to keep the redstone or get that Maze Map Focus?" you can instead dump things in an Ender Pouch to be sent back home. This is especially easy if you can sync up the Ender Pouch's respective Ender Chest to have items being automatically extracted by an Engine on the overworld.
Enter from the side. The rule of "never dig straight down" applies here. Although it's tempting to enter from the top, grab the ores and sneak out unnoticed, this doesn't happen in Small Hollow Hills or anywhere else. This is especially true because Small Hollow Hills are very cramped and there's little to no breathing room, which can give you a tactical advantage, as mobs won't be able to get to you. Enter from the side of the hill (the elevation of the floor inside the hill is approximately the same as regular floor in the Forest) and light up the floor. This is also true because, amid all the stalactites, it's hard to relocate a ceiling-based entrance, even with use of a Jetpack. I've tried and failed many times.
Light up the floor first. Tying into the "mobs before loot" principle, this principle states that, before making staircases towards the stalactites of Iron and Redstone Ore, you should light up the floor, the spawners and so forth. Otherwise, you can have Skeletons (and in larger Hollow Hills, nastier creatures like Slime Beetles and Fire Beetles) shooting at you while collecting ore, or a Zombie could wander up your staircase and push you to your death amidst a dozen Redcaps.
Destroy the chests. Once you've gotten the items out of a chest, break it so you don't keep looking in there. This wastes valuable time. Even if there's items you don't want in there, break it and let the items despawn.
Previous tactics also apply. Major notable ones that still apply are stay alert, build a base, and don't underestimate threats. Barriers are almost built for you in a Small Hollow Hill, you just have to find a way to use them to your advantage.
Part Nine: Leveling Up (Medium Hollow Hill)[edit]
Now that we've had some experience in combat and navigation in a Hollow Hill, we can move on to a larger variety. If you can, locate one using your Magic Map. Remember, the icon will be six pixels wide at the base.
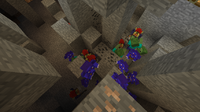
By the way, this is where ore acquisition begins. Large amounts of Iron and Coal, decent amounts of Redstone and Lapis and small amounts of Diamond can be found in these hills, as well as a decent amount of mod-added ores, although mod-added ores will appear as veins in the walls, stalagmites or floor, but will not hang from the ceiling as vanilla ores will.
Here are the mobs that you will face inside of a Medium Hollow Hill:
| Mobs Approach: | |
|---|---|
| Mob Name: Fire Beetle | |
| Mob Name: Pinch Beetle | |
| Mob Name: Slime Beetle | |
| Mob Name: Redcap Sapper |
In addition to these, you may also seen mobs you've seen before, such as the Redcap Goblin and the Swarm Spider.
The Fire Beetle is a bit of a nasty creature, although not too dangerous. The Fire Beetle can deal either melee damage for two hearts, or it can light you on fire, which deals a variable amount of damage depending on how long the fire lasts. I would advise carrying a water bucket on your bar at all times, as a water bucket will allow you to extinguish yourself should you be lit on fire. An interesting side note: despite the Fire Beetle's command of fire via fire breath, it is not invulnerable to fire damage or lava.
The Pinch Beetle is a very, very nasty creature. If you can, stay away from any and all Pinch Beetles that you see. If a Pinch Beetle approaches, ready your sword and just start swinging as rapidly as you can. The Pinch Beetle will "pinch" you with its large pincers if it gets in range (note: range of the beetle is MUCH larger than the player's melee range) which will allow it to pick you up and carry you around. If this occurs, kill the beetle as rapidly as possible. If you dawdle, it may very well kill you, as an unarmored player will die after three hits from the Beetle, which will take only eight seconds to deal. Once you kill the beetle, you will be able to move normally again.
I very, very strongly advise using ranged weapons for this creature, such as a bow. Otherwise, you may find yourself being carried through an angry group of Redcaps and Fire Beetles with no method of defending yourself or controlling where you go. Be careful.
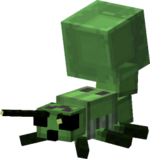
The Slime Beetle is the best range-optimized beetle. It shoots projectiles that take on the sprite of a Slime Ball item from vanilla Minecraft which deal 5 hearts of damage per hit to an unarmored player, whom would be killed in two shots from these projectiles. These originate from the tip of its tail (which is made of resized meshes and textures from the slime mob) and fly towards the player at a moderate velocity. However, the fire rate of a Slime Beetle is a bit high, marginally greater than that of a Skeleton. Badly-armored players should treat this mob with caution and, like the other two beetle species, use ranged weapons. This is really the best advice for dealing with Beetles: bows, mining lasers, whatever you are most comfortable with as a ranged weapon, as more often than not, melee just won't cut it. Literally.
The Redcap Sapper is a very devious creature who is found only rarely in Medium and Large Hollow Hills. When killed, he can drop an Ironwood Pick and/or Boots. However, he is quite a bit more dangerous than his cousin the Redcap Goblin. The Redcap Sapper likes to walk up behind the player, place a block of TNT, light it, and then run away at high speed. Thus, the Sapper poses great danger to players who are using a Furnace, sorting their inventory, or making new tools. For these actions, I would advise walling yourself off behind two or more layers of a suitable building block, both for this purpose and defending yourself from the various kinds of Beetles.
Tactics[edit]
As with Small Hollow Hills, previous tactics apply. Here are some new ones you'll want to take into account:
Trust your bow. Ranged mobs play a major role here and in the Large Hollow Hills. Take lots of arrows, if you haven't been doing so already, and take a quality bow. I would recommend enchanting your bow if at all possible with Power II or greater, as Power II or a higher enchantment will allow you to two-shot mobs such as Skeletons, Zombies, and anything with ten hearts. Power I will allow you to do this as well, but only sometimes, and it doesn't always work on Zombies.
Take a good amount of tools. You'll be mining a lot of ores, fighting a lot of mobs, lighting a lot of area, and so forth. Take several pickaxes, several swords, a backup shovel, some backup torches and building blocks (obviously) and stow them in an Ender Pouch or two so they don't clutter your inventory in the heat of combat or when you are trying to make space for that diamond you just mined.
If you have the ability to make Chunk Loaders or make and operate World Anchors and you are operating from an overworld base or a different location in the Forest, you can also set up a system to pump items that you place in one Ender Pouch back to base to be stored in chests from the Iron Chests mod, and stow your equipment in another pouch. Beware that a Redstone Engine may not be sufficient to pump items rapidly enough.
Make sure that you are well-armored. Ironwood might just barely be sufficient for Medium Hollow Hills. If at all possible, I would advise upgrading to Modular Powersuits armor, IndustrialCraft2's NanoSuit or Diamond Armor. This is not strictly necessary, but it may go a long way towards protecting you from damage.
Keep an eye on your exit. Caves can sometimes pierce the lining of a Hollow Hill. If they do, use this to your advantage. Keep one or two exits in mind at all times, so that you can escape when necessary if there are several Beetles chasing you.
Part Ten: Final Challenge (Large Hollow Hill)[edit]
Once you've filled your pockets with loot and gotten used to combat, we can move on to the final goal: the Large Hollow Hill. The main differences between the Large Hollow Hill and the Medium Hollow Hill is that the Large Hollow Hill can generate veins of Emerald Ore and can spawn Twilight Wraiths, whereas the Medium Hollow Hill cannot.
| Mobs Approach: | |
|---|---|
| Mob Name: Twilight Wraith |
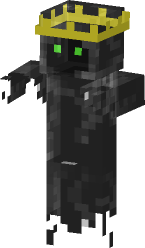
Twilight Wraiths spawn in fairly large numbers, but only in Large Hollow Hills. After a period of time, there can be a dozen or so Wraiths flying around, provided that the floor is lit properly. Wraiths can be very dangerous. I would advise using bows or other ranged weapons to kill them, as when they do attack the player, they fly up to the player rapidly, damage the player and then rapidly fly away, giving the player little or no time to retaliate via sword. I would also advise staying very alert, as Wraiths can be hard to see due to their mostly transparent nature.
Tactics[edit]
No, really. I am not joking. Light the freaking floor up before you go for the freaking ores. This is even more true in the Large Hollow Hill. Wraiths can fly, which means they can knock you off of the ore vein you are mining quite easily and send you reeling into a large group of enemies below.
Go for the valuables first. I would actually highly advise having an item-pumping system to allow for Ender Pouched items to be transferred back to base for a Large Hollow Hill. This way, you can grab the emeralds and the diamonds, stow them in the Ender Pouch, then go for the rest. This removes the risk of creepers blowing up the ores or you. This will also prevent tricky inventory management decisions, e.g. do I pick up this one stray emerald or keep the stack of coal? do I keep my pumpkin pies or take the ironwood?
Go for the chests last. These will only distract you while lighting up the floor, and these will only clog your inventory when mining ores. Likewise, break chests you don't need or want, as these will distract you and slow you down while mining ores, lighting up the hill, and so forth.
Eye on the exit. As with a Medium Hollow Hill, keep a few exits in mind to escape quickly. This is even more necessary with the presence of Wraiths in these hills.
Keep your inventory clear. Regularly clear out mob drops like Bones, Arrows, Rotten Flesh and so forth so that you will have room for valuables and loot from chests. If you have enough room/resources, you can also use Ender Storage-based item transfer systems or keep several Ender Pouches on you so that you have plenty of room to store items or categorize items for later sorting once you get back to base.
Keep backup ingots on you. Storing a stack or half-stack of Iron, Ironwood or your crafting material of choice is much more compact than storing several sets of tools and a backup set of armor.
No such thing as a wasted precaution. Your armor set might break, as might your tools, your bow, and everything in your inventory. Anticipate the absolute worst, prepare for that, and then go beyond that. That will ensure that you are prepared for a Large Hollow Hill, as there will be a lot of monsters, and although there's a lot of good loot, it can also be very dangerous.
Epilogue[edit]
Other things you can do in the Twilight Forest:
Try to find a Quest Grove. If you can find an Enchanted Forest, there's almost certainly a Quest Grove, in which you will find a Quest Ram. If you feed the Quest Ram one of each color of wool (vanilla wool, not Rockwool) the Ram will give you a Crumble Horn (which can turn stone into dirt, dirt into gravel, and then break dirt/gravel, dropping it as an item; not very useful, but fun) and one of each vanilla resource block (Iron, Gold, Lapis, Emerald and Diamond.) They are very rare, though. Your Magic Map will be helpful.
Locate and defeat a Naga. The Naga is not that hard to find or to defeat, but it can be a fun and semi-challenging battle. If you have a Jetpack, I would recommend standing on the pillars that dot the Naga Courtyard and taking him out with a ranged weapon. The Naga drops Naga Scales on death, which can be used to create Naga Scale Armor. The Naga can also be defeated with a melee weapon, although it's a bit trickier and tougher on your armor and health levels.
Check out the rest of the articles on this wiki about the Forest for more information. Below is the Twilight Forest navigation template, an easy way to get to and from articles about the Twilight Forest.
Note[edit]
- ↑ To save space, the recipes for Ironwood Tools and Ironwood Armor are not shown, as they are identical to the recipes for making armor out of vanilla items.
- ↑ Liveroot blocks are not affected by Pulverizers or Macerators and can only be actually harvested with use of Silk Touch.
| ||||||||||||||||||||||||||||||||||||||||||||||||||||||||||||||||||||||||||||||||||||||||
