ATLauncher Wiki:Sandbox
| This is a sandbox page. You can test wiki editing and templates here. There is no obligation to respect the style guide, however please do not post any spam or profanity. |
| Sandbox | ||
|---|---|---|

| ||
| Source Mod | GregTech 4,Factorization | |
| Type | Metal | |
| Ore | ||
| Ore | | |
| Native Cluster | | |
| Spawn Levels | 10-35 | |
| Biomes | All | |
| Dimensions | overworld,Nether | |
| Variants | ||
| Ingot | ||
| Block | ||
| Dust | ||
| Tiny Dustpile | ||
| Plate | ||
| Nugget | ||
This page is for any tests.
Welcome to the sandbox!
Anyone can edit this.
Contents
Simple Editing[edit]
To edit a page, click on the "edit" tab, usually near the top of the page. Then, edit the box in the page. Feel free to practice here, on this page. It's here just for you to practice.
A blank line indicates a paragraph separation.
You can link to another page by putting the name or title of that page in double square brackets. [[Main Page]] becomes Main Page.
Simple Formatting[edit]
Create headers by putting text in between repeated equal (=) signs. The more =, the lower level the heading is.
Create a bulleted list by starting each item with an asterisk (*)
- it's ok to make editing mistakes
- you can preview your work before saving it
- even after saving it, you or someone else can edit it again to make it even better
Formatting for Emphasis[edit]
Put single quote marks around words or phrases for formatting emphasis.
Two single quotes, like ''italics'' will create italics.
Three single quotes, like '''bold text''' will create bold text.
Other stuff...
If you know HTML or CSS formatting commands, they can also be used in this wiki. One useful HTML command is <br /> which creates a line break.
If you want to show what a command looks like, rather than actually implementing the command, surround it with the nowiki command.
Adding Tables[edit]
When you bring up the editing window, you'll see the word "Advanced" next to the reference icon. Its options include inserting tables, which can be super-useful.
| You can make them sortable by values | This is a column! |
|---|---|
| 1) Super Simple | B |
| 2) Stuff, huh? | A |
Adding Pictures[edit]
You can add pictures, too! It's a bit trickier, but the simplest sort work like this:
[[File:Grid_Red_Mushroom.png|40px]]
[[File:Grid_Item/block name.png|Size in pixels]]
(In case you've never used "|" before, you get it with shift+backslash (the key above your enter button))
For images beyond items and blocks, you can use this sort of formatting:

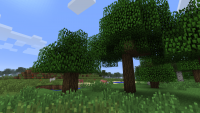
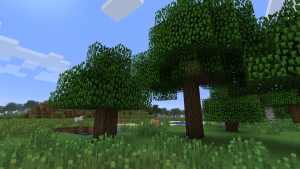
[[File:Oaktrees.png|200px (left) thumb (right)|A small and large oak tree.]]
[[File:filename.png|thumb or size in pixels|description if thumb]]
Thumbnails are preferable to defining images by pixel size alone in almost every instance. In fact, now that we've compared thumbnails to "normal" images, let's see the full range of features for thumbnails:
[[File:File.png|sizepx|thumb|left|alt text]]
So that's file:filename.png, size in pixels (200 is default), designation as thumbnail, alignment (left, right, center), and optional subtext.
You can also upload your own at the Special:Upload page. When uploading and adding images, you should keep Feed The Beast Wiki:Style Guide#Images in mind. In fact, you should probably read the whole Feed The Beast Wiki: Style Guide right now, if you haven't already. Don't be intimidated. If your page is weak, someone will fix it; better we have SOMETHING than nothing, as long as you're not flat-out wrong (ex: dimmondz r tastii n breed creprs).


